91ÊÓÆµÍøÕ¾ÎÛ

Published

A New Approach to Tool Presetting

This non-contact presetter has a number of design elements that enable it to perform effectively on the shop floor. It looks and operates differently than other presetters currently available, too.

Share

Leaders-In background


Using a presetter to accurately measure the true lengths and diameters of tools installed in their holders can greatly reduce setup times for new jobs. That’s because presetting tools for one job while a machine is running another eliminates the need to spend time touching off tools and running test cuts. The ROI for a presetter comes from higher spindle utilization and less machine downtime.
 
Shops get the most out of presetters when those measuring devices are located on the shop floor close to the machines. This minimizes tool transport time and travel throughout the shop. Knowing this, manufacturers of presetters focus their efforts on designing devices that will function accurately and reliably in environments that aren’t always the cleanest or most thermally stable.
 
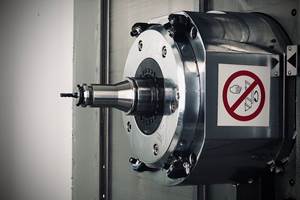
One example is the new Airmatrix non-contact presetter for milling and turning tools from DMG/Mori Seiki. Andre Jesse, a product sales manager for the company, says the Airmatrix has a number of design elements including minimal moving parts that enable it to perform effectively on the shop floor. It looks and operates differently than other non-contact presetters currently available, too.
 
For instance, the sensing unit on many non-contact presetters is attached to the base of the device and travels on guideways to measure the tool installed in the device’s spindle. In most cases, the sensing unit’s horizontal and vertical position is determined by feedback from glass scales. However, the optics for the Airmatrix are contained in a freely moveable sensing unit supported by an air bearing, Mr. Jesse explains. This enables users to easily glide the sensing unit across a thermally stable, bulletproof glass plate to measure the tool mounted in a horizontally oriented spindle. The sensing unit’s position on the plate is determined by a CCD camera that reads tiny, two-dimensional data matrix codes embedded in the glass plate. In effect, the glass plate is the device’s “scale.” High positioning accuracy for the sensing unit is possible because the data matrix codes have high information storage capacity.
 
Because the glass plate lies flat atop the device’s cast iron bed, it is less likely to be affected by base expansion than conventional glass scales housed in aluminum bodies, Mr. Jesse says. In addition, the sensing unit’s air bearing (which activates whenever the user touches the unit to move it) helps clean the scratch-resistant glass by blowing away dirt and debris.
 
The Airmatrix presetter provides tool measurement accuracy of ±2 microns and is available in two sizes. One version accommodates tools as big as 200 mm in diameter and 500 mm in length. The other can measure tools as large as 400 mm in diameter and 1 meter in length. The device uses the company’s Windows-based Microvision V control. Developed specifically for the Airmatrix, this control features an intuitive, touchscreen interface and enables cutting edge inspection with live image display. Measurement routines can be performed manually or automatically in which the spindle rotates at a fixed rate. A built-in printer enables users to print labels with offset information and affix them to tools. Users also have the option of downloading tool offset information directly to the machine.


Related Content

Toolholders

How to Troubleshoot Issues With Tool Life

Diagnosing when a tool is failing is important because it sets an expectation and a benchmark for improvements. Finding out why gives us a clue for how to fix it.

Read More
Holemaking

Custom PCD Tools Extend Shop’s Tool Life Upward of Ten Times

Adopting PCD tooling has extended FT Precision’s tool life from days to months — and the test drill is still going strong.

Read More
Sponsored

Quick-Change Tool Heads Reduce Setup on Swiss-Type Turning Centers

This new quick-change tooling system enables shops to get more production from their Swiss turning centers through reduced tool setup time and matches the performance of a solid tool.

Read More
Sponsored

The Future of High Feed Milling in Modern Manufacturing

Achieve higher metal removal rates and enhanced predictability with ISCAR’s advanced high-feed milling tools — optimized for today’s competitive global market.

Read More

Read Next

Basics

Machine Shop MBA

  Making Chips and 91ÊÓÆµÍøÕ¾ÎÛ are teaming up for a new podcast series called Machine Shop MBA—designed to help manufacturers measure their success against the industry’s best. Through the lens of the Top Shops benchmarking program, the series explores the KPIs that set high-performing shops apart, from machine utilization and first-pass yield to employee engagement and revenue per employee.  

Read More
Automation

AMRs Are Moving Into Manufacturing: 4 Considerations for Implementation

AMRs can provide a flexible, easy-to-use automation platform so long as manufacturers choose a suitable task and prepare their facilities.

Read More